How can I edit the movies I recorded with my DVD camcorder?
Solution
The Corel Application Disc CD-ROM includes software that will allow you to play back movies, transfer movies to a computer and easily edit them, make copies of your disc or create (author) new personalized discs, and more. For further details, refer to the help files of each program.
Install the software on a computer meeting the following minimum requirements. The applications may not work correctly depending on the specifications and settings of your computer and the software already installed.
Make sure you have a valid Internet connection. You will not be able to use the software without successfully completing the user registration.
Required System Configuration* for Corel Application Disc
| Operating System | Windows XP SP2 | Windows Vista |
| CPU | Intel Core Duo: 1.66 GHz Intel Pentium 4: 1.0 GHz Intel Pentium M: 1.0 GHz Intel Celeron: 1.3 GHz | Intel Core Duo: 1.66 GHz Intel Pentium 4: 2.4 GHz Intel Pentium M: 1.6 GHz Intel Celeron: 2.8 GHz |
| RAM | 256 MB | 1 GB |
| Available Hard Disk Space | Installation only: At least 400 MB Disc authoring: At least twice the amount of data to be recorded on the disc** | |
| Monitor/Display | 1024 x 768 color display with 16-bit color video card | |
| Others | DVD drive with writing capabilities compatible with DVD-R/DVD-RW discs, Internet connection (required for user registration) | |
| * Equivalent or better configurations can be used instead. | ||
| ** For a full, standard-size (12 cm) DVD-R/DVD-RW - at least 10 GB. | ||
Turn on the computer and start Windows. Check that the camcorder is not connected to the computer.
1. Insert the Corel Application Disc CD-ROM into the computer's CD or DVD drive.
The InstallShield Wizard will launch automatically.
2. Select the language for the installation from the drop-down menu and click [OK].
3. Click [Next].
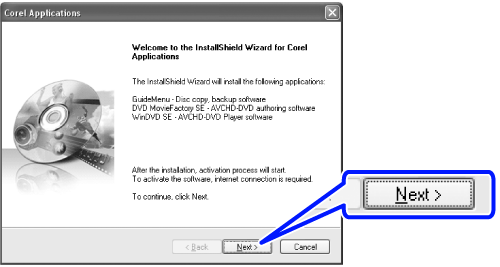
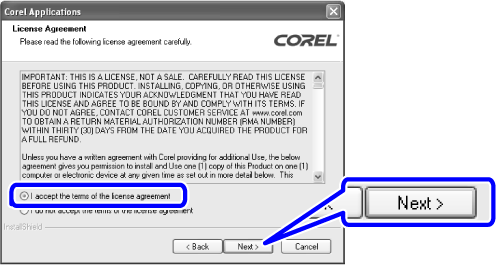
4. Read the license agreement and click [Next].
Select [I accept the terms of the license agreement] to continue.
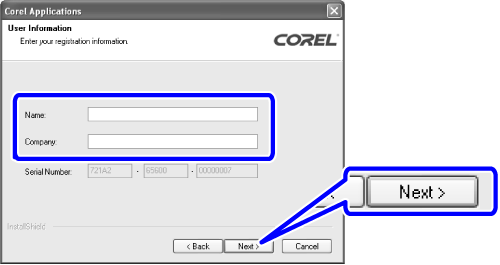
5. Enter the user information and click [Next].
Enter your name and (optionally) your company affiliation.
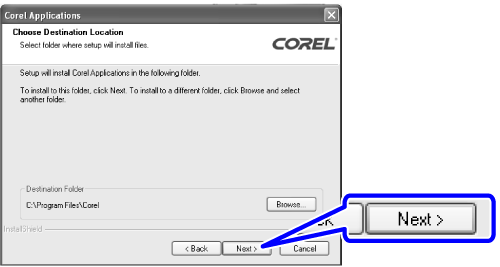
6. Check the destination folder for the files and click [Next].
7. Select your country/region of residence and the local video standard and click [Next].
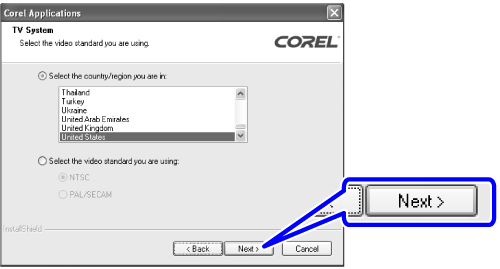
8. Review the installation settings and click [Next] to start copying the files.
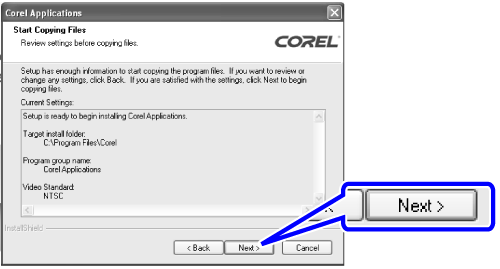
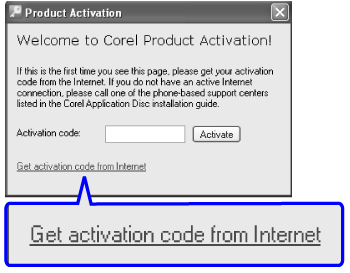
After the installation files have been copied, connect to the Internet to complete the user registration online. You will not be able to use the software without successfully completing the user registration.
During the user registration, leave the Corel Application Disc CD-ROM in the computer.
1. Click on the link to get the activation code.
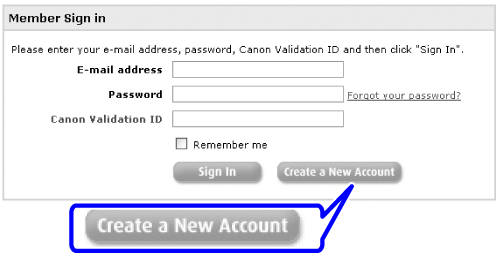
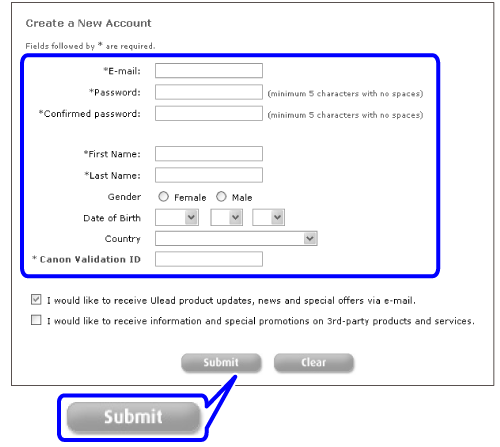
2. Click [Create a New Account] to create a new Ulead member account.
If you have already registered as a Ulead member, continue directly to step 4.
3. Enter the user information and click [Submit] to register the account.
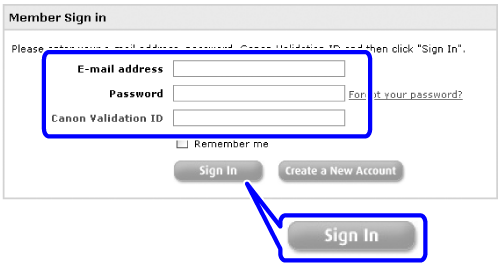
4. Enter your Ulead member account's e-mail address and password, and the Canon Validation ID. Click [Sign In].
- The Canon Validation ID is the camcorder's serial number. To find its location, refer to the camcorder's instruction manual.
- After you sign-in, you will receive a serial number that serves as the activation code.
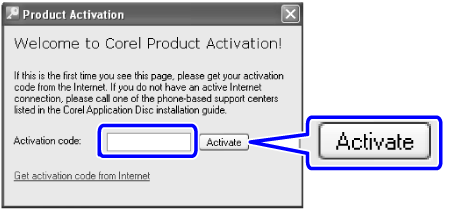
5. Enter the activation code (serial number) you received over the Internet and click [Activate].
6. Once the activation is completed, click [OK].

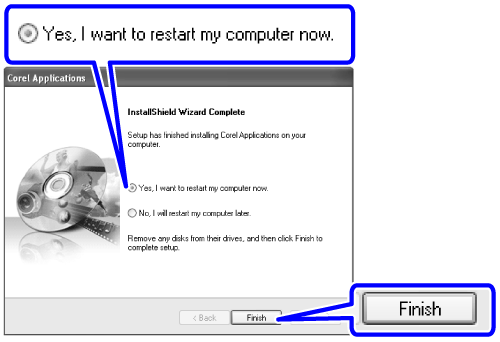
7. Select [Yes, I want to restart my computer now.] and click [Finish].
Connect the camcorder to the computer to make copies of the disc or back up your files on the hard disk. To play back movies (WinDVD SE) or edit movies (DVD MovieFactory SE), you can also insert a finalized disc directly into the computer's DVD drive without having to connect the camcorder. For further details, refer to the help files in the respective software.
1. Connect the camcorder to a power outlet.
Power the camcorder using the compact power adapter.
2. Turn on the camcorder and set it in video playback mode.
Refer to the camcorder's instruction manual.
3. Connect the camcorder to the computer using the USB cable.
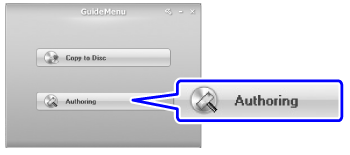
The GuideMenu screen will appear automatically.
4. Click [Authoring].
NOTE
IF THE GUIDEMENU SCREEN DOES NOT APPEAR
Double-click the desktop icon  to launch the GuideMenu application.
 to launch the GuideMenu application.
Use this editing software to touch up your videos (cut, delete and move scenes), to add music, titles and transition effects and to create your own DVDs with personalized menus. For further details, refer to the help files in the DVD MovieFactory SE software. Note that only the following movies can be edited:
Use this editing software to touch up your videos (cut, delete and move scenes), to add music, titles and transition effects and to create your own DVDs with personalized menus. For further details, refer to the help files in the DVD MovieFactory SE software. Note that only the following movies can be edited:
Discs - Scenes from discs recorded and finalized with this camcorder.
Movie Files - Files that were saved on the computer using "Import".
CAUTION
- When using this software with a standard-definition DVD camcorder, we do not recommend that you use MovieFactory SE to create highdefinition AVCHD discs for the following reasons:
- The image quality does not improve when creating an AVCHD disc from a standard-definition DVD disc.
- Converting data to AVCHD specifications takes a considerable amount of time.
- High-definition discs created or copied using Corel software can be played back only with AVCHD-compatible DVD players. Do not insert such discs into a DVD player that is not compatible with AVCHD specifications as you may not be able to eject the disc.
- When using a computer that has only one DVD drive to read and write data, you will be able to use only DVD-RW discs; DVD-R and DVD-R DL discs cannot be copied in such case.
NOTE
- If you include in a disc scenes that were not recorded with this camcorder, the disc may not be played back correctly.
- If you have the editing software Roxio MyDVD for Canon installed in your computer, you will not be able to burn the disc if more than one copy is selected in the [Copies:] option. In such case, burn only one copy at a time.
- When editing video files, you can select the option [Save As] in the
 (Settings and options) menu to save the edited scenes. Later, you can open an existing project to continue editing or burn additional copies of the disc.

