How to specify [Use Draft Mode]
Solution
NOTE
Clarifications of the operation and additional explanations for the procedure are indicated at the end of the following procedure. Reading these notes is highly recommended.
1. Display the [Document Properties] dialog box.
For Windows 98/Me: Display the [Document Properties] dialog box or the [Printer Properties] dialog box.
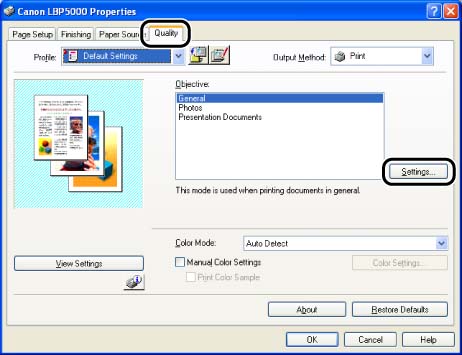
2. Display the [Quality] sheet, then click [Settings].
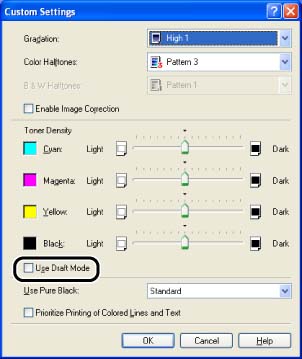
3. Specify [Use Draft Mode].
The draft mode is used to print a test page. By using the draft mode, you can print by thinning out the print data.
4. Confirm the settings, then click [OK].
The [Quality] sheet reappears.
5. Click [OK].
NOTE
a. The screen shots used in this section are from Windows XP Professional.
b. If you display the [Document Properties] dialog box from an application, you can specify the settings only for the job.
c. If you display the [Document Properties] dialog box from the [Printers and Faxes] folder or [Printers] folder (Windows 2000/XP/Server 2003); or if you display the [Printer Properties] dialog box from the [Printers] folder (Windows 98/Me), you can specify the default settings for all jobs.
d. For displaying the [Document Properties] dialog box or [Printer Properties] dialog box, see Related Information at the end of this page.
e. Using the draft mode may decrease print density, making printed text look patchy.