Solution
Customizing a Picture Style
You can customize a Picture Style by adjusting individual parameters such as [Sharpness] and [Contrast]. To see the resulting effects, take test shots.
The procedures for customizing picture styles are explained in the following sections.
1. Set the camera's power switch to [ON].
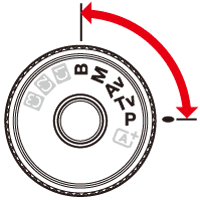
2. Set the Mode Dial to [ P / Tv / Av / M / B].
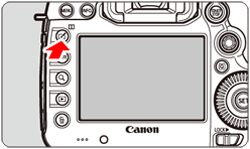
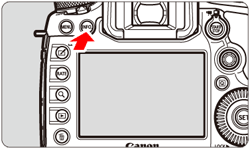
3. Press the [

] button.
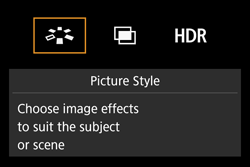
4. Turn the [

] dial to select [

], then press [

].
REFERENCE
You can also select the Picture Style with [

: Picture Style].
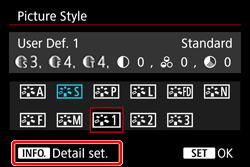
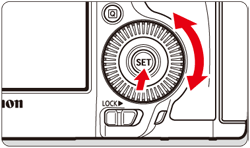
5. Turn the [
] dial to select a Picture Style, then press the [ INFO. ] button.
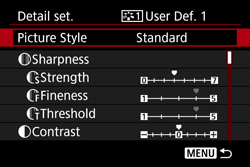
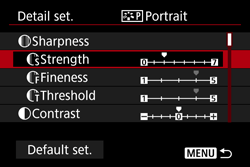
6. Turn the [
] dial to select a parameter such as [Sharpness], then press [
].
NOTE
- By selecting [Default set.], you can revert the respective Picture Style to its default parameter settings.
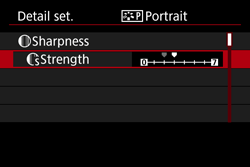
7. Turn the [
] dial to adjust the parameter as desired, then press [
].
- Press the [MENU] button to save the adjusted parameters. The Picture Style selection screen will reappear.
8. Any parameter settings different from the default will be displayed in blue.
IMPORTANT
- [Fineness] and [Threshold] for [Sharpness] will not be applied to movies.
- To shoot with the Picture Style you adjusted, first select the adjusted Picture Style, then shoot.
REFERENCE
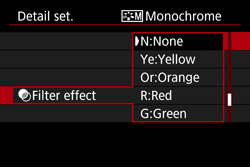
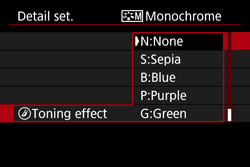
[

: Monochrome Adjustment ] Besides [Strength], [Fineness], or [Threshold] of [Sharpness] and [Contrast], you can also set [Filter effect] and [Toning effect].
- With a [Filter effect] applied to a monochrome image, you can make white clouds or green trees stand out more.
- By applying a [Toning effect], you can create a monochrome image in that color. It can make the image look more impressive.
* For more information on [Filter effect] and [Toning effect], please refer to the camera’s instruction manual.
Registering a Picture Style
You can select a base Picture Style such as [Portrait] or [Landscape], adjust its parameters as desired and register it under [User Def. 1], [User Def. 2], or [User Def. 3].
You can create multiple Picture Styles with different settings for parameters such as sharpness and contrast.
You can also adjust the parameters of a Picture Style that is registered to the camera with EOS Utility (EOS software).
- To register a Picture Style, carry out steps 1 to 4 above, and then follow the procedures below.
5. Turn the [
] dial to select [User Def. *], then press the [INFO.] button.
6. With [Picture Style] selected, press [
].
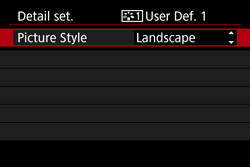
7. Turn the [
] dial to select the base Picture Style, then press [
].
*[Landscape] has been selected in the example image.
- To adjust the parameters of a Picture Style that is registered to the camera with EOS Utility (EOS software), select the Picture Style here.
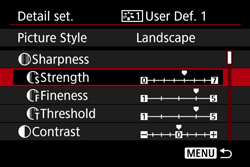
8. Turn the [
] dial to select a parameter such as [Sharpness], then press [
].
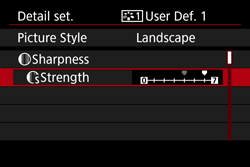
9. Turn the [
] dial to adjust the parameter as desired, then press [
].
- Press the [ MENU ] button to register the modified Picture Style. The Picture Style selection screen will then reappear.
10. Any parameter settings different from the default (

) will be displayed in blue. The base Picture Style (

) will be indicated on the right of [User Def. *].
IMPORTANT
- If a Picture Style has already been registered under [User Def. *], changing the base Picture Style in step 6 will nullify the parameter settings of the registered Picture Style.
- If you execute [Clear all camera settings], all the [User Def. *] settings will revert to their defaults. Any Picture Style registered via EOS Utility (EOS software) will have only its modified parameters reverted to the default setting.
NOTE
- To shoot with the Picture Style you adjusted, select the registered [User Def. *], then shoot.
- Regarding the procedure to register a Picture Style file to the camera, refer to the EOS Utility Instruction Manual


 : Sharpness
 : Strength
 : Fineness*1
 : Threshold*2
 : Contrast
 : Saturation
 : Color tone